
How to Make Surfboards
This article will tell you all that you need to know about making surfboards. You'll learn about the materials and tools that you'll need, and this will provide a step-by-step guide for you.

In the eyes of outsiders, the surfboard building process might be a straightforward one: just get the surfboard shape right by cutting the material impeccably, throw in a couple of fin boxes, and you're done.
In actuality, for surfers who want to make their own surfboard, the process is - of course - much more complicated and layered. You need to make your own surfboard design (or, if you don't want to do that, you need to find a surfboard template that's in line with your wants and needs), you need to find the right tools, you need to gather lots of raw material, and you need to prepare it all for the different stages of board building: shaping, glassing, sanding, polishing, and making fin boxes and leash plug.
Once you prepared all your tools, worked hard for days, and ended up with a surfboard, you might not reap the benefit of your efforts just yet. When you jump on your board and try to catch some waves, you may realize that the board doesn't really perform the way you intended and imagined. After all, as Clayton Nienaber (our head coach and a master board shaper) repeatedly says, it's actually a process of trial and error, in which you need to be able to understand the feedback you're getting from your board and use it to continue shaping it accordingly.
However, don't let all this big talk discourage you. We're living in the age of the internet and everything we need to know is generally just a click away. So, with the right guidance, no matter how complicated things seem, they'll be rendered easier. In this article, that's what we're aiming to do so that you can shape your own boards with ease of mind.
Materials and Tools You Need in the Board-Building Process
Before getting into the process itself, first you need to know about the materials and tools you're going to use when making a board. Let's start listing them so that you can go shopping sooner rather than later.
Materials
Surfboard Blank
The surfboard blank, also known as foam blank, is the yet untouched body of your surfboard. You're going to cut it based on your own template.
Mind that surfboard blanks are not uniform, and there are all kinds of blanks in the market - regardless of whether the difference is the shape or the raw material. Make sure you pick one that's in line with the board shape and quality you want to have: if you want to make epoxy boards, you need to get EPS foam, and if you want to make polyester surfboards, you need to use polyurethane foam.
The prices of polyurethane foam range between $100-200 and it's the raw material for most boards in the market. Epoxy foam, on the other hand, is used in industrial-level surfboards and is much more expensive than its PU counterparts. You can probably find either of those at your local surf shop.
If you're not particularly confident about your skills on your first go at board-making, it's recommended to make a cheap purchase. You might move onto high-quality material once you gained experience.
Fiberglass Cloth
You'll wrap the fiberglass cloth around the surfboard blank after you cut it. It means that purchasing hardly-woven fiberglass cloth will make your surfboard sturdier. Moreover, you're going to need at least three layers of it wrapped around the blank. So, make sure you purchase enough.
Polyester Resin
There are two types of polyester resin: laminating resin and sanding resin. The one you need to get for making a surfboard is the laminating one. Your local hardware store might only sell a sort of mixed resin, but let us warn you that if you want to get an ideal one, make sure it's specifically made for surfboards.
In the end, that resin is going to constitute the shell of your board, which is of crucial importance. You'll need a gallon of that, which will cost roughly around $50.
Of course, that's the case only when you use polyurethane foam. If you already purchased epoxy foam, don't you ever use polyester resin on it.
Epoxy Resin
Epoxy boards are still rarer than polyester boards despite the obvious gap in quality. Therefore, it would be strange if your first board ends up being an epoxy board. But, at the same time, why wouldn’t it? Just let us tell you that epoxy resin and foam, for that matter, will be much more expensive than their polyester counterparts.
Resin Hardener
Resin, in general, needs to be mixed with some sort of a surfacing agent or hardener so that it can be dried and easily sanded afterwards. Otherwise, you'll find sanding the hot coat incredibly difficult (and even infuriating).
The hardener is mostly included in the resin package with information about how much of it you need in the mix, but that might not always be the case. So, purchasing some waxed styrene or MEKP catalyst would do the job. Again, the specifications of how much to put into the mix should be written on the packaging.
Fin Box and Leash Plug
You can decide to make fin boxes and the leash plug all by yourself and from scratch, but why go to such lengths when you can find them easily anywhere?
If you're an experienced surfer who wants to make their own board, you don't need to hear this, but let's mention it for the sake of thoroughness: fin boxes go under the board and hold your removable fins, and leash plug goes on the back of your board to hold the leash.
Tools
Of course, there are lots of necessary tools for making surfboards. You'll need different tools for each stage of the process: shaping, glassing, sanding, applying the gloss coat, and installing fin boxes and a leash plug. You might already have some of those, but even if you don't, you can easily find them in hardware stores.
Shaping Tools
- Shaping stands: You need a stand or a rack on which you can cut and shape the foam. A good shaping stand should be stable and high and wide enough so that you can work in ease, and it should have enough padding so that the foam isn't damaged.
- Saw: You need to cut a rough outline from the foam in accordance with your template. Regardless of whether it is a handsaw or jigsaw, a saw will come in handy for that.
- Electric planer or hand planer: An electric planer might be expensive, especially considering all the expenditure you'll have on other raw material and tools, but it'll save lots of time. A hand planer is capable of trimming the foam down to the thickness you want, too, but it might take more time than you’d like.
- Sandpapers and sanding blocks: You need to have lots of sandpapers with different levels of grit. Those that have more grit will be better for the shaping process. The ones with less grit, on the other hand, are ideal for sanding resin. You'll also need some pieces of hard and strong wood to use as sanding blocks.
- Shaver: No matter how skillful you are in your cutting and planing, there'll always be certain bumps and blemishes on the outline curve. You can shave them off with a rasp or shaver.
- Yard stick: You can have all the tape measure in the world, but none of it will be as useful as a yard stick when shaping surfboards.
- Protection: You need to protect yourself against splinters and flying pieces of foam. To that end, it's better to have dust masks, rubber gloves, and protective glasses ready in the process.
Glassing Tools
Surfboard glassing includes lots of resin-related actions, so you need to be ready for those.
- Mixing containers: You're going to mix resin with hardeners, and as resin is not really a friendly material, it's better doing it in cheap and disposable containers. Don't use the bucket your kid builds sandcastles with.
- Mixing sticks: After the work is done, the sticks will probably find themselves in the trash bin. So, choose them with that in mind.
- Rubber squeegee or plastic spreader: If you're aiming for a polyester board and using polyester resin, use a rubber squeegee. On the other hand, if you're working with epoxy resin, use a plastic resin spreader.
- Shears: If you heeded our advice about getting a heavy fiberglass cloth, you'll need really big and strong shears to be able to cut it.
- Masking tape: You need to cover the fin boxes when applying resin.
- Protection: When it comes to dealing with resin, protection is even more important than it is for the process of shaping. Believe us, you really don't want to be exposed to resin without a high-quality face mask. Also, you don't want to approach it with your bare hands, either.
Tools for Sanding, Glossing, and Fin and Leash Plugs
We have already covered some of the tools that you need for sanding and glossing such as lots of sandpapers with various grit levels and sanding blocks. But, there are still a few items left:
- Surfboard polish: You're making a whole new board by yourself, and even if it doesn't work as you intended on the waves, you at least want it to have a great look. A high-quality polish will help you with that.
- Fin install kit: These days, fin boxes (fin systems) generally come with a fin install kit, and they might work wonders.
- Chisel: You need some chisel-like tool to carve out holes for fin boxes.
- Paint: Well, if you're not going to personalize your surfboard by painting some cool stuff on it, why even bother? Okay, the emphasis might shift to performance-oriented designs for further projects, but if it's your first, you can at least have some fun. Make sure the paint you get is water-based acrylic, though. Otherwise, you might damage your board.
How to Make a Surfboard: A Step-by-Step Guide
Now that we have covered all the raw material and tools that you need for making a functional surfboard by yourself, we may go on and guide you through how to make it step by step. But first, there are some basics we need to get out of the way.
You need a good, wide, and most importantly, ventilated space. You might work in your garage with the door left open or you might work in your backyard as long as it doesn't rain or snow. Also, there might be no need to say it, but the light is very important. After all, if you can't see what you're doing clearly, how can you be sure you’re even doing it?
#1 Preparing a Surfboard Template
If you're sure about how you want your new surfboard to look and feel, you can create your own surfboard template. One way to do it is tracing the outlines of the surfboard in your mind on a thin piece of wood (like plywood) or on a big piece of cloth with board markers (or something similar). Be wary, though, that if the rocker of the surfboard you want to make is not flat, neither plywood nor a piece of cloth can reflect that.
You don't need to completely rely on your imagination and drawing abilities, either. Nowadays, there are computer programs that help you create a surfboard template on your own. They even immediately give you the volume of a surfboard depending on its length, width, thickness, and curves. Some of these programs and apps are even free, so you can have fun with your design as much as you want.
However, using the board of your dreams as a template on your first go is not really recommended. First, you need to make sure that you're able to pull it off, and once you gain that kind of self-confidence, you can start using your own templates.
Regardless, when you have the template drawn or printed on plywood, you need to secure it on the shaping stand. First, you are going to cut the extra parts so that you can have the shape of a surfboard and then trim it with a razor blade just to be thorough. Then, you're going to use it to trace the outlines of your foam blank, which is actually a part of our next step.
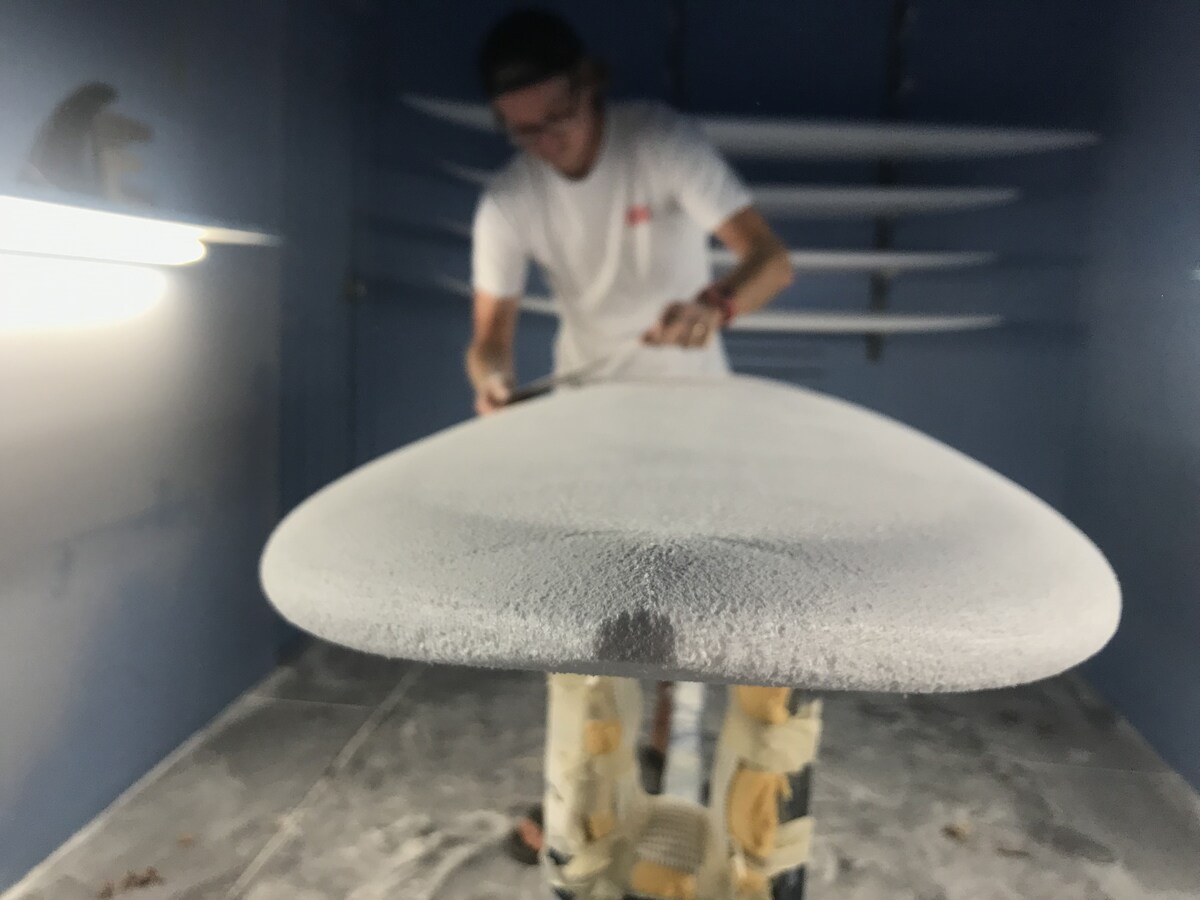
#2 Shaping the Surfboard
Remember that your template is still secured in place on the shaping stand. Well, now you need to secure the foam blank below it in a way that their stringer lines would completely overlap with each other. Then, you need to trace the outlines of the template on the blank with a good marker (an erasable one is preferred).
There will be some excess foam on the blank once you draw the outline. Cut that excess carefully, especially when you're on the nose of the foam, because the stringer line is at its most vulnerable there. Also, make sure you're cutting the excess at least an inch beyond the outline, as trimming that inch with tinier and more accurate tools like electric planers and razor blades is when you really get down to shaping.
Once you're done cutting the outline, you can start planing both the underside and top of the foam to reach the thickness you desire. Once again, be careful around the nose. Even better, when you're planing the nose, use a hand planer even if you have an electric planer handy.
Then, move onto shaping the curves on the rails. Remember, more curve means high-performance and less curve means buoyancy. After handling the curves, you can start using sandpaper to refine the edges, and you're ready to glass it!
#3 Glassing the Surfboard
Secure your surfboard blank on the stand with its downside up. Now, it's time to use those strong shears to cut a piece of fiberglass cloth so that you can cover the underside of the foam blank. Make sure that it drapes and completely covers the rail curves.
Then, you can start mixing polyester resin (or epoxy resin) with the hardener according to the ratio specified on the packaging. Pour it over the fiberglass cloth and spread it evenly with the squeegee. You need to do the spreading as quickly and carefully as possible since resin only takes five minutes or so to cool and harden.
Now, you can take a rest. Actually, you'll need to take a rest because resin should be left untouched for a day to vulcanize. After one day, you're going to apply the same procedure to the other side (the topside) of the board blank: cutting fiberglass cloth, mixing resin, spreading it evenly, and letting it vulcanize.
#4 Adding Fin Boxes and Leash Plug
The most important aspect when adding a fin box to your board is getting the fin placement right. So, make sure that you're right on point with where you want your fins to be and mark them with a pencil. Then, use your chisel to carve them and sandpaper to smooth them out.
Once again, we need to employ resin, but this time, its purpose is securing the fin boxes into their places. Pour some resin into the holes you carved for your fin system and quickly insert the fin boxes.
Cover the fin boxes with masking tape and pour resin all over the underside of your surfboard (where the fin boxes are) and spread it again. Wait for a few hours for the resin to vulcanize and then apply the same procedure on the other side.
Before proceeding towards the leash plug installment, you need to wait for a couple of hours as well so that the resin may vulcanize. After that, you'll just need to drill a hole a couple inches inside from the tail. To secure it, pour resin inside the hole like you did with the fin box setup.
#5 Sanding the Board and Finishing
Sanding is pretty straightforward: you have to sand the board until it's smooth, shiny, and soft to the touch. However, there might be certain moments when you lose yourself in the repetitiveness of the process and over-sand. In those cases, just pour some extra resin to the places you over-sanded, wait for it to vulcanize, and sand again.
Obviously, though, that's going to unnecessarily prolong the process. So, being careful while sanding in the first place is a much better idea.
After sanding, you'll just need to wait for three days, and then, we promise, your board will be ready to be taken out into the ocean.
Wrapping Up...
Well, surfboard making is not really that different from surfing itself. In both, you need to be patient, you need to pay attention to details, and you need to have a certain level of craft in you.
However, it might not be as rewarding as surfing in some aspects: you're not out there in the ocean, you're inhaling the odours of dust and resin, and you're not even sure that you're going to have a functional surfboard at the end of the day.
In the end, though, so long as you keep working, learn from your mistakes, and pinpoint what you want from a surfboard, you'll be amazed what a custom-made one is capable of.


.jpg)


